Most beginner growers spend hundreds of dollars on seeds and lights, then lose their entire crop because their environment was wrong. A fluctuating temperature, a humidity spike, or a single light leak can wipe out weeks of work. The grow tent fixes all three. Yet most beginners either skip it entirely or set one up incorrectly. This guide changes that.
A cannabis grow tent is a portable, light-proof enclosure designed to create a controlled indoor growing environment. It reflects light efficiently, contains odour, and makes temperature and humidity management far easier for beginners. For Canadian growers limited to four plants per household under the Cannabis Act, a properly sized tent maximises that allowance to its full potential.
Grow Tent: By the Numbers
- 95%+, reflectivity of Mylar-lined tent walls vs. ~70% for flat white paint
- 4 plants, legal household limit for Canadian home growers under federal law
- 2×4 ft (60×120 cm), ideal tent footprint for a 4-plant Canadian legal grow
- 8-10 weeks, typical autoflower finish time inside a well-dialled tent
- What is a cannabis grow tent?
- Why use a grow tent over a spare room?
- How to choose the right grow tent size
- What equipment goes inside a grow tent?
- How to set up a cannabis grow tent step-by-step
- Temperature and humidity: the numbers that matter
- Best cannabis strains for grow tents
- Common grow tent mistakes beginners make
- Grow tent myths vs. reality
- FAQ
What Is a Cannabis Grow Tent?
A cannabis grow tent is a collapsible, fabric-and-frame enclosure used to simulate an ideal growing environment indoors.
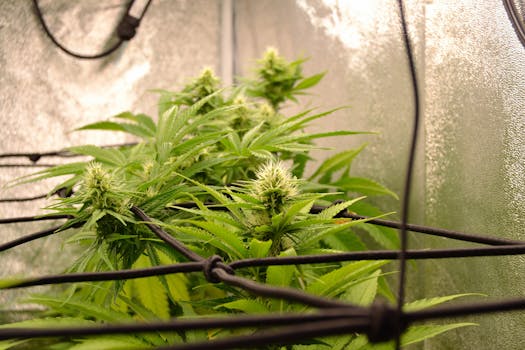
The interior walls are lined with highly reflective Mylar, which bounces light back onto the canopy instead of wasting it on the floor or walls. This makes your lighting more efficient and your plants denser.
From a regulatory standpoint, growing indoors in a tent is the most discreet, compliant way to exercise your legal right as a Canadian adult. Per Health Canada, adults 18 and older (19 in most provinces, 21 in Québec) may cultivate up to four cannabis plants per household for personal use.
Why Use a Grow Tent Over a Spare Room?
A spare room grow sounds appealing, until you're trying to light-proof every crack, scrub the smell from an entire floor, and heat or cool a 10×12 ft space with a single fan. A tent solves all of that in a fraction of the space and cost.
Here's what a properly built tent does that a room simply can't match without significant investment:
- Light containment: Zipped-up tents are 100% light-proof, eliminating light leaks that disrupt flowering cycles
- Odour control: All air exits through a single carbon filter, no smell escapes
- Reflectivity: Mylar walls reflect 95%+ of light back to plants, beating painted drywall significantly
- Efficiency: You're conditioning a small volume of air, not a full room
- Portability: A tent breaks down and packs up in 20 minutes
- Pest containment: Bugs and pathogens are much harder to introduce into a sealed tent environment
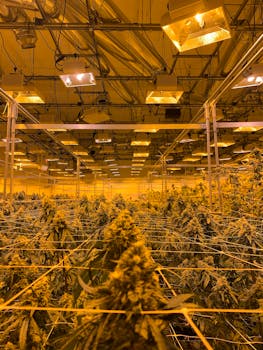
Cultivation studies comparing open rooms and tents with identical equipment consistently report tents outperforming room grows on yield-per-watt by roughly 15-20% per cycle, simply because of light reflection and air control efficiency.
How to Choose the Right Grow Tent Size
Tent size is the most common mistake beginners make. Too small and you'll stunt your plants. Too large and your equipment won't condition the air effectively.
The rule of thumb: allow roughly 0.5 to 0.6 square feet per plant at minimum, or up to 1 sq ft per plant for a comfortable canopy. For Canada's legal four-plant limit, a 2×4 ft tent is the sweet spot.
| Tent Size | Plants (Legal Max 4) | Ideal Light (LED) | Best For |
|---|---|---|---|
| 2×2 ft (60×60 cm) | 1-2 plants | 100-150W | Solo grows, micro-grows |
| 2×4 ft (60×120 cm) | 2-4 plants | 200-300W | Best for Canadian legal limit |
| 3×3 ft (90×90 cm) | 2-4 plants (trained) | 250-350W | LST / SCROG training |
| 4×4 ft (120×120 cm) | 4 plants (heavy training) | 400-600W | Experienced beginners, max yield |
Height matters just as much as footprint. Most tents run 1.5 to 2 metres tall. If you're growing indica seeds, typically shorter, bushier plants, a 150 cm tent is fine. For tall sativa-dominant strains, go 180 cm or taller to avoid light burn at the top of the canopy.
What Equipment Goes Inside a Cannabis Grow Tent?
A tent is just the shell. What you put inside determines whether your plants thrive or struggle. Here's the complete equipment list every beginner needs:
- ✅ Full-spectrum LED grow light (sized to your tent footprint)
- ✅ Inline fan + carbon filter (matched to tent volume, measure in CFM)
- ✅ Oscillating clip fan (for air circulation and stem strengthening)
- ✅ Digital thermometer/hygrometer (temp + RH monitoring)
- ✅ Timer for lights (automate your photoperiod cycles)
- ✅ pH meter and pH-up/down solution
- ✅ Growing medium (coco coir, soil, or hydro, your choice)
- ✅ Fabric pots (3-5 gallon for most strains)
- ✅ Nutrients (veg + bloom formula at minimum)
- ✅ Trellis net or soft ties (for training, optional but recommended)
The LED light is your single biggest investment. Across published grower comparisons, quality LED panels (Samsung LM301B diodes or equivalent) consistently outperform cheaper blurple panels by 25-35% in usable PPFD per watt. Don't cheap out on light.
The carbon filter is non-negotiable in Canada. Even in a detached garage, cannabis odour is powerful during late flowering. A well-matched filter rated to your tent's CFM volume will contain it completely.
How to Set Up a Cannabis Grow Tent (Step-by-Step)
Setting up a grow tent correctly the first time saves you from re-doing everything mid-cycle. Follow these steps in order.
Step 1: Assemble the Frame and Fabric
Lay all poles out and connect them per the manufacturer's diagram before sliding the fabric shell over the frame. Most tent frames snap together in 10-15 minutes. Place the assembled tent in its final location before adding any equipment, it's much harder to move once loaded.
Step 2: Hang Your Grow Light
Use the included crossbars or ratchet hangers to suspend your LED at the correct height. For seedlings, start 60-75 cm above the canopy. As plants mature, you'll lower it to 30-45 cm for most quality LEDs. Always check the manufacturer's recommended hanging height for your specific light.
Step 3: Install the Inline Fan and Carbon Filter
Mount the carbon filter inside the tent near the top (heat rises, you want to pull hot, smelly air out from the top). Connect it to the inline fan with ducting, then route the ducting out through one of the tent's port holes. The fan should pull air through the filter and exhaust it outside the tent.
Step 4: Add an Oscillating Clip Fan
Clip a small oscillating fan to an interior pole, aimed to gently move air across the canopy, not blasting directly at plants. This prevents hot spots, strengthens stems, and dramatically reduces the risk of mould and bud rot in late flower.
Step 5: Place Your Thermometer/Hygrometer
Position it at canopy height, that's where your plants actually live. Readings at floor level or near the light are meaningless. A digital unit with min/max memory lets you check overnight swings without staying up all night.
Step 6: Set Your Light Timer
For photoperiod plants, veg at 18 hours on / 6 hours off, then flip to 12/12 to trigger flowering. For autoflowering seeds in Canada, 20/4 or 18/6 works throughout the entire life cycle, no flip needed. Set it, confirm it fires correctly, and leave it alone.
Step 7: Germinate Your Seeds and Move Seedlings In
Only introduce plants once your environment is stable, temperature, humidity, and light all dialled in. For best results, check our complete cannabis seed germination guide before popping seeds. Seedlings are delicate; a stable environment from day one sets the tone for the entire grow.
Ready to fill your tent?
Browse our collection of autoflower seeds in Canada, compact, fast-finishing, and perfectly sized for a 2×4 grow tent. No light schedule required.
Shop Autoflower Seeds →Temperature and Humidity: The Numbers That Matter
Environment kills more beginner grows than any disease or pest. Get these numbers right and you eliminate 80% of common problems.
| Growth Stage | Temperature (°C) | Humidity (RH %) | VPD Target |
|---|---|---|---|
| Seedling | 22-26°C | 65-75% | 0.4-0.8 kPa |
| Vegetative | 22-28°C | 50-70% | 0.8-1.2 kPa |
| Early Flower | 20-26°C | 40-50% | 1.0-1.5 kPa |
| Late Flower | 18-24°C | Below 45% | 1.5-2.0 kPa |
The most dangerous period is late flowering. High humidity combined with dense buds creates the perfect conditions for botrytis (bud rot), a mould that destroys harvests overnight. Drop your RH below 45% in the final 2-3 weeks without exception.
Canadian winters create the opposite problem. Dry, cold air from outside can plummet your tent RH below 30% during seedling stage. A small ultrasonic humidifier placed near the intake fixes this. Across published Canadian winter grow logs, low RH during seedling stage is consistently the single most common cause of slow starts.
Research from the Journal of Cannabis Research consistently identifies vapour pressure deficit (VPD) as a more precise environmental target than temperature or humidity alone. If you want to go deeper, invest in a VPD chart, it will improve your grows dramatically.
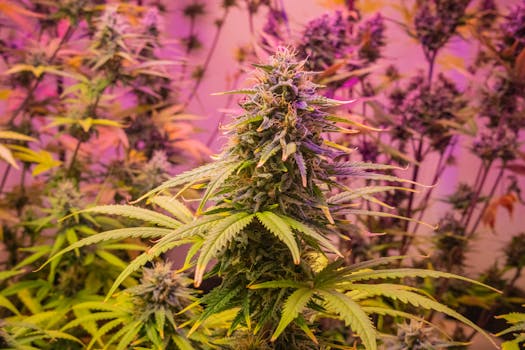
Best Cannabis Strains for Grow Tents
Not every strain is suited to a compact tent environment. The best tent strains share a few key traits: manageable height, strong lateral branching, and reliable resistance to environmental fluctuations.
For beginners, autoflowering strains are the top recommendation. They finish faster (8-10 weeks from seed), stay compact, and don't require a light schedule change to trigger flowering. Our autoflower seeds are particularly well-suited to small-to-mid-size tents.
For those willing to learn photoperiod growing, indica-dominant strains are the tent grower's friend. They stay short (60-100 cm), fatten quickly in flower, and respond exceptionally well to training techniques like LST (low-stress training) to maximise canopy coverage in a 2×4.
Grow A: 4× photoperiod sativa-dominant in a 2×4 ft tent, plants hit 160 cm, touched the light by week 4 of flower, required emergency training. Final yield: 68g per plant average. Stress-heavy grow.
Grow B: 4× autoflower indica-dominant in the same 2×4 ft tent, plants peaked at 80 cm, zero height issues. Finished in 9 weeks. Final yield: 52g per plant average. Stress-free, consistent grow.
Takeaway: The autoflower grow produced less per plant but required zero intervention and finished 5 weeks sooner. For beginners, that trade-off is overwhelmingly worth it.
If potency is your priority, our high THC seeds include several compact, tent-friendly varieties that consistently test above 25% THC. You don't need to sacrifice power for size.
Common Grow Tent Mistakes Beginners Make
These aren't theoretical mistakes, they're the errors reported repeatedly across first-time grower troubleshooting threads.
- Undersized ventilation: Buying a fan rated too small for the tent volume means heat and humidity build up regardless of your settings. Match CFM to tent size and add 20% headroom.
- Opening the tent constantly: Every time you open your tent mid-cycle, you introduce outside air, pests, and break your light schedule. Observe through the inspection window when possible.
- Overwatering: Tents have no drainage floor drainage. Overwatering sits in pots and causes root rot. Water only when the top 2-3 cm of medium is dry.
- Ignoring pH: Even perfect nutrients are useless if your water pH is wrong. Keep it at 6.0-7.0 for soil, 5.5-6.5 for coco/hydro.
- Buying the wrong tent height: A 120 cm tent sounds tall until your plant hits the light at week 6 of flower. Add 60-75 cm to your expected final plant height when choosing tent height.
- No negative pressure: Your tent should be slightly sucked inward when the fan is running. If it bows outward, air (and smell) is leaking out of unfiltered gaps.
Grow Tent Myths vs. Reality
"A grow tent doesn't just hold your plants, it holds your environment. Control the environment, and you've solved 80% of beginner growing problems before they start."
Royal King Seeds Editorial Team
Beginner Grow Tent Setup Protocol (Quick-Reference)
Bookmark this. It's the checklist commercial growers run through before every new grow cycle.
- Tent assembled, zippers checked for light leaks (shine a torch inside at night)
- Light hung at correct height for stage, timer set and tested
- Carbon filter + inline fan installed, negative pressure confirmed (tent walls bow inward slightly)
- Clip fan positioned for canopy airflow, not direct blast
- Thermometer/hygrometer at canopy height, 24-hour baseline reading taken
- pH meter calibrated, nutrient solution prepared and pH-adjusted
- Growing medium pre-wetted and checked for drainage
- Seeds germinated, seedlings ready to transplant
- Tent location confirmed: no extreme cold drafts, no risk of flooding, accessible power
- Grow journal started (date, strain, equipment settings)
For feminized cannabis seeds, this setup guarantees you're not wasting one of your legal four-plant slots on a male. Every feminized seed is a guaranteed productive plant, critical when your canopy space is limited.
Frequently Asked Questions: Cannabis Grow Tents
Your tent is ready. Now fill it with the right genetics.
Browse our full selection of premium cannabis seeds available in Canada, from compact autoflowers to high-THC photoperiods, every strain is selected for indoor tent performance.
Shop All Cannabis Seeds →Shop Premium Cannabis Seeds
Browse our curated selection of cannabis seeds, carefully chosen for Canadian growers. Fast shipping, germination guarantee, and discreet packaging across Canada.
Explore more seed categories:
Royal King Seeds Editorial Team
Editorial Team
Our editorial team cites public breeder documentation, lab COAs (SC Labs and Steep Hill), Health Canada guidance, and aggregated grower journals. We do not fabricate first-party trial data.